


I'm getting a late start on my tutorial today--Memorial Day Weekend festivities wiped me out. I'll try to compile another mosaic of yesterday because J, C, and I were all matching which made for some funny photos. Not to mention, the other pictures from yesterday that highlighted the incredible meal that my parents dished out!
Today I'm going to show you how to make a menu bar for your Blog. I use Blogger so, unfortunately, i do not know if this will work for Wordpress, etc. Let me know if it does, though, so other people can try it!
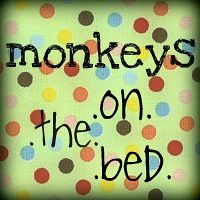
You might be asking, "Uhh...what is a menu bar?" You can see mine immediately underneath my "Monkeys on the Bed" banner--it has image links to most of my themed posts.
If you want to add a menu bar, first think of where you want to navigate your readers. I wanted people to be able to easily find my tutorials, I❤Faces, Word of God Wednesdays, etc. Once you've figured that out, you can now start working on the button images {Special note: you don't have to make image buttons for your menu bar but i think they look cuter!}
I wanted my button images to be really simple and blend in with the white background. You can easily make these buttons on Microsoft Word (which is what I did) or through an online photo editor like Picnik. Even though I used Word, I'm going to tell you how to make your buttons on Picnik because everyone has access to that!
Go to Picnik and upload any old picture--doesn't matter what you choose because we are going to be covering it with a white rectangle in just a second.
The best instructions I have found for this are at 'Tips for New Bloggers' in Bizwhiz's post entitled ' Add Page Element to Blogger Header and Blog' and at Real Life Blog
Both blogs have excellent instructions (and Bizwhiz has color illustrations!) so make sure you check out their sites if you get lost or confused with my tutorial!
First, you have to change your template which will allow you to increase your options for adding page elements:
Now you have a place to add those cute little buttons you just made. If you've ever added a button in normal page elements, this step will not be tricky for you, it is just a slightly loooong process! Get ready to add them by gathering all your URLs
YAY you did it! Please let me know if you have any issues or questions!
It appears that Mr. Linky is having HUGE issues these days (it isn't even working for my fave site, I❤Faces!) but if you have a tutorial that you want to share (and i hope you do!), please feel free to leave a comment linking to it. Also, feel free to grab the Tutorial Tuesday button!
Today I'm going to show you how to make a menu bar for your Blog. I use Blogger so, unfortunately, i do not know if this will work for Wordpress, etc. Let me know if it does, though, so other people can try it!
You might be asking, "Uhh...what is a menu bar?" You can see mine immediately underneath my "Monkeys on the Bed" banner--it has image links to most of my themed posts.
If you want to add a menu bar, first think of where you want to navigate your readers. I wanted people to be able to easily find my tutorials, I❤Faces, Word of God Wednesdays, etc. Once you've figured that out, you can now start working on the button images {Special note: you don't have to make image buttons for your menu bar but i think they look cuter!}
I wanted my button images to be really simple and blend in with the white background. You can easily make these buttons on Microsoft Word (which is what I did) or through an online photo editor like Picnik. Even though I used Word, I'm going to tell you how to make your buttons on Picnik because everyone has access to that!
Go to Picnik and upload any old picture--doesn't matter what you choose because we are going to be covering it with a white rectangle in just a second.
- Once your picture is uploaded, crop it to be a rectangle--I chose my buttons to uniformly measure 125x50 but you can choose any measurement you want!
- Hit "Create" and then choose "Stickers". Scroll down until you see the "Geometric" sticker options
- Choose the rectangle shape and then make the rectangle as big as your cropped image--you want it to fill the image you just cropped so that it is the full dimension of your button. You can also choose to make it any color you'd like--I chose white.
- Now that you have a nice button shape, choose the "Text" option under the "create" tab
- Type in the text for your button and then choose your font, color, size, placement, etc. Have fun playing around with it--there are lots of options!
- Once you are satisfied with your first button, save it to an online photo host--you are going to need its URL soon!
- The great thing about Picnik is that once you save your photo, you can choose to "Continue Editing" it.
- Choose "Continue Editing" and double click on the Text Box. Type in the next text for your second button, make sure that the font is the same size, and save it as you did for your first one.
- Carry on making buttons, saving, and uploading them until you have all the buttons you need
- {Special note: I also made a green circle image to place in between my buttons which you can do as well!}
The best instructions I have found for this are at 'Tips for New Bloggers' in Bizwhiz's post entitled ' Add Page Element to Blogger Header and Blog' and at Real Life Blog
Both blogs have excellent instructions (and Bizwhiz has color illustrations!) so make sure you check out their sites if you get lost or confused with my tutorial!
First, you have to change your template which will allow you to increase your options for adding page elements:
- Click on your Template tab and then click Edit HTML
- PLEASE save and download a copy of your full template RIGHT NOW before you make any changes
- Hit 'Ctrl F' to search your HTML template and type in "showaddelement" to locate the proper place in your HTML code to make changes--there are three places where "showaddelement" appears and we are going to change each one just a bit.
- Look for a place in the code that says:
<div id='header-wrapper'> <b:section class='header' id='header' maxwidgets='1' showaddelement=' no'>
- Change the maxwidgets to 3 and the showaddelement to yes - You will now have two extra places where you can add page elements.
- Search for the next "showaddelement" until you find this code:
<div id='main-wrapper'><b:section clas='main' id='main' showaddelement=' no'>
- Change the showaddelement to yes. You now have two new options in your template to add page elements before and after your blog header. NOTE: The process is different for the Dots template. I would suggest reading Bizwhiz's article in entirety.
- Last time you have to change the code: Scroll down to where you see the code reading:
<div id='content-wrapper'> <div id='crosscol-wrapper' style='text-align:center'> <b:section class='crosscol' id='crosscol' showaddelement=' no'/></div>
- Change showaddelement to yes
- Your blog layout should now have an 'Add Page Element' option between the blog header and the blog post section. That new section is what we will manipulate to add a horizontal navigation or menu bar.
- After completeting the HTML changes, preview your blog to ensure everything is looking good (you won't see anything new just yet as you have not added a page element--your blog should just look normal). Now you can save your new template!
Now you have a place to add those cute little buttons you just made. If you've ever added a button in normal page elements, this step will not be tricky for you, it is just a slightly loooong process! Get ready to add them by gathering all your URLs
- You should have all the URLs to your button images--keep them handy and maybe open each image in a separate tab so that you can easily see them.
- We also need the URLs for the links to each button. Look at your buttons that you made--each one should be linking to a particular label, (like my "tutorial" label), post (like an "about me"), email address ("contact"), etc.
- If you want the link to one of your labels, simply click on the label in your blog and a window will open with all the posts you've ever listed with that particular label. That URL will be the link to its corresponding button.
- You can also use the handy "search this blog" box in the left hand corner of your Blogger--for example, if I wanted, i could find all the posts that mentioned "the twin" and get an URL for that!
- NOTE: i recommend opening a new tab for each link--that way, all your links for your labels will be open and it won't be as confusing--so if you have 4 buttons, open a new tab for each button's link (hope that makes sense!)
- if you want a "Contact" button linking to your email, the coding is just
<a href="mailto:youremail@yourdomain.com">Now that we have our button images' URLs and our page URLs, we are ready to add the HTML coding!
- While still in the layout editing mode, choose "add a page element" in the new horizontal box you just made.
- Choose add "HTML/Javascript" (don't worry! this HTML code isn't hard!) This is where we will need all those button URLs so keep them handy!
- The code for each button will look similar to this:
<a href="http://yourblog.blogspot.com/search/label/yourlabelhere " target="_blank"><img border="0" alt="YourLabelHere" src="http://farm3.static.flickr.com/xxx.jpg"/></a>
- You need to replace the RED text with the link to your first button label and replace the BLUE text with the URL for the image that corresponds to the label link you just used (the part in RED)
- Where it says "yourlabelhere" replace it with the name of your button
- MAKE SURE YOU ALWAYS KEEP THE QUOTATION MARKS!
- Do this for all your buttons! Yes, it can take a while but if you have all your URLs handy, you should be able to put it together rather easily...i hope!
- After adding all your buttons, center them by adding <center> at the top of your HTML coding and </center> at the bottom of your coding.
YAY you did it! Please let me know if you have any issues or questions!
It appears that Mr. Linky is having HUGE issues these days (it isn't even working for my fave site, I❤Faces!) but if you have a tutorial that you want to share (and i hope you do!), please feel free to leave a comment linking to it. Also, feel free to grab the Tutorial Tuesday button!


9 people think...:
This was such an awesome tutorial! I can't wait to give it a try myself when I have a few extra minutes. Thanks so much for taking the time to share all this info!
~Angie
co-founder of iHeartFaces
Thank you so much. I was wondering how this was doneand Voila... here it is! ;)
Oh how cool! Thanks for posting this! I've been wondering how to do it!
This is great! I have wondered how to do that--can't wait to find time to try it. Here is the link for my tutorial this week: http://ourlincolnlog.blogspot.com/2009/05/tutorial-tuesday-chocolate-chip-banana.html
Wanted to share this tutorial from my friend, Sam. I think it is awesome and can't wait to try it, personally! Thought some others might like to give it a try as well: http://sailingthehudson.blogspot.com/2009/05/setting-up-worm-composting-bin.html
I can't wait to dig into this post. Thanks so much!
Thank you SO much! I have been trying to figure out how to do this for ages! I've added a menu bar to my new photography blog, plan to add one to my personal blog as well.
Thank you!!
Allright, just spent an hour getting this done finally! Thanks so much for posting this!
You sooo amaze me!!
Post a Comment