


First a few housekeeping points:
So I know a lot of you like blogs because you can enter to win things! Sometimes, to get an extra entry, you can add someone's blog button. (Speaking of which, don't forget, I have a tutorial for an animated blog button!) Anyway, if you are like me, then you end up having gazillions of buttons cluttering up your blog and people can't figure out who YOU are in the midst of them!
So, to solve that, lets create a scrolling side bar (also known as a scrolling marquee). This may only work in Blogger...sorry Wordpress friends!
(To see what I'm talking about, quickly scroll down and glance over to the right column. You should notice that all my buttons are scrolling and that, if you place your mouse over one of them, the scrolling stops and you can click on the selected button. Pretty nifty.)
- If anyone wants to be a guest Tutorial Tuesday poster, please let me know and we'll feature you! Maybe a little break will get the creative juices flowing again!
- I've been LOVING using my "frosting scrub" and my wipe solution from last week's tutorial. Did anyone try it? Love it? Hate it?
- Unrelated to Tutorials BUT big fun news--Giveaways will now run for a full week, ending on Saturdays. That means you have extra time to enter the Noodles&Milk contest! So go enter now!
So I know a lot of you like blogs because you can enter to win things! Sometimes, to get an extra entry, you can add someone's blog button. (Speaking of which, don't forget, I have a tutorial for an animated blog button!) Anyway, if you are like me, then you end up having gazillions of buttons cluttering up your blog and people can't figure out who YOU are in the midst of them!
So, to solve that, lets create a scrolling side bar (also known as a scrolling marquee). This may only work in Blogger...sorry Wordpress friends!
(To see what I'm talking about, quickly scroll down and glance over to the right column. You should notice that all my buttons are scrolling and that, if you place your mouse over one of them, the scrolling stops and you can click on the selected button. Pretty nifty.)
- Choose "Customize" in your layouts
- Click "Add a gadget"
- Choose "Html/Javascript"
- I didn't enter a title. You can, though, and have it say anything you like, such as "Some great giveaway blogs" or "Blogs I Love to read"...etc...
- Since we are creating a marquee, type in (or paste)
- The Marquee direction can be changed to "down" "left" or "right" If you want your buttons to scroll across the bottom of your blog, choosing "left" or "right" might make more sense!
- I chose the width to be the width of my column. Sometimes people won't change the width and you'll see truncated blog buttons scrolling by you. Sad! Make the width as big as you can so as to accommodate all the blog button widths that you have on your site.
- The scroll amount is the speed. You can make it move slower or faster, to your liking. My tip for this is make sure people who are viewing the side bar can view each individual button!
- Since mine won't center unless I ask it to center again, I entered <center> one more time. Maybe it will work for you!
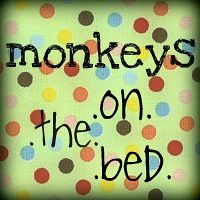
- Now that we have it all set up, find those button codes that bloggers ask you to post and start entering them. For example, my tutorial button code looks like this (don't be alarmed by it!):
- I like to add a <br><br> between each button that I add. That way, the buttons are not sitting on top of each other and you have a break (or in this case, two breaks) between each button, clearly distinguishing one from the next.
- Continue adding (by copying and pasting) all the button codes that you want--I think i have close to 25 over there!
- When you are finished with the copying and pasting, you need to close off your marquee. Type in </marquee>
- Hit "Save"
- Preview your blog! Sometimes I have to hit refresh to make sure it is working.
- When you come across another cool blog that you want to feature, just go back into the layout settings and customize this marquee. Whenever I add another button, I just edit this Html/Javascript box by adding the new button DIRECTLY ABOVE the </marquee> Of course, if you want people to see it immediately, you can put it in the front...
Now to the content!
<marquee direction="up" width="200" onmouseover="this.stop()" scrollamount="3" onmouseout="this.start()" height="200" align="center"><center>
<a href="http://monkeys-on-the-bed.blogspot.com/" title="Tutorial Tuesday with monkeys on the bed!"><img border="0" width="200" alt="Tutorial Tuesday with monkeys on the bed!" src="http://farm4.static.flickr.com/3311/3609819998_5eae6540df_o.gif" height="200"/<


7 people think...:
Oooh hooray!!! Thank you for doing this! In all of my "spare time" I'll be playing with this. Or, perhaps in August ;)
Hope you enjoyed your time in NC!
xoxo
Thanks again!
You are sooo great at simplifying and explaining these things so that even i can understand and DO it. THank you!!!
My tutorial (finally finished): http://ourlincolnlog.blogspot.com/2009/06/tutorial-tuesday-calendar-art.html
things you learn the hard way...too many buttons will stall your blog!
This is a great idea for sure! I finally had to move all of mine to a separate page because it was slowing down my blog so badly.
Thank you thank you! I got here from "The Duncans"!! :)
-E
hmmm I'm confused..LOL I get confused very easily..do I put that code in my html, or the box itself?
Post a Comment